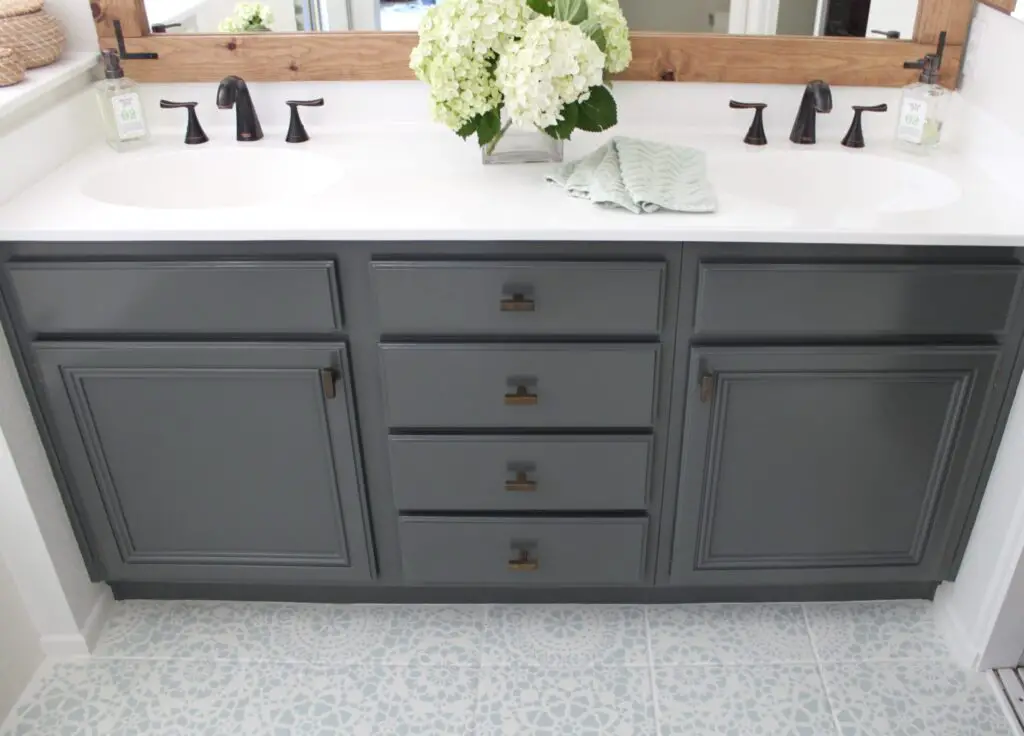
To restore a bathroom vanity, begin by removing hardware, doors, and drawers, then paint and install new components for a fresh look. Updating your vanity can enhance your bathroom's style and character without replacing the entire unit.
Whether through refinishing, painting, or refacing, various DIY methods can transform your vanity for a new aesthetic. From applying new paint to changing hardware and countertops, these makeovers provide creative ideas for a budget-friendly refresh. Refurbishing a bathroom vanity allows for customization and personalization, elevating the overall appeal of your bathroom space.
With simple steps like cleaning, priming, and painting, you can achieve a stunning vanity makeover without the need for a complete replacement.
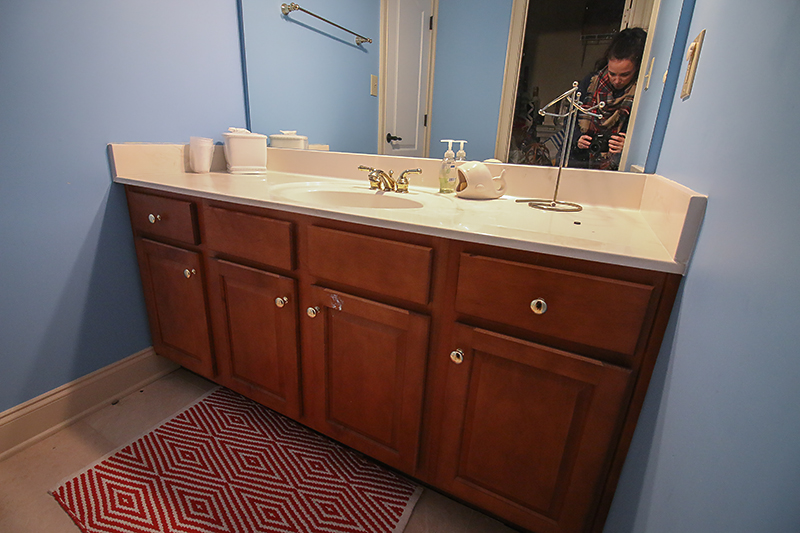
Credit: www.bowerpowerblog.com
Initial Preparation For Vanity Restoration
Before you begin the restoration process, it's crucial to ensure that you have all the necessary materials and that the surrounding area is adequately protected. The initial preparation sets the stage for a successful and efficient restoration of your bathroom vanity.
Gather Your Materials
First and foremost, gather all the materials you'll need for the restoration project. This may include:
- Protective gear: Gloves, safety goggles, and a mask to ensure your safety.
- Tools: Screwdriver, sandpaper, paintbrushes, and any other tools required for disassembly and refinishing.
- Cleaning supplies: TSP (trisodium phosphate), wood cleaner, and other appropriate cleaning agents.
- Refinishing materials: Primer, paint, stain, or any other materials you plan to use for the restoration.
Protect Surrounding Area
It's essential to protect the surrounding area before you start working on the vanity. This will prevent damage to other fixtures and surfaces in your bathroom. Here's how you can effectively protect the surrounding area:
- Remove any items: Clear the area around the vanity of any items or accessories to create a clear workspace.
- Cover surfaces: Use drop cloths or plastic sheets to cover the floor, countertops, and any nearby fixtures to prevent them from getting splattered or damaged during the restoration process.
- Ventilate the area: Ensure proper ventilation by opening windows and using fans to expel fumes and dust generated during the restoration.
Disassembling The Vanity
Transform your bathroom by refurbishing the vanity with a fresh coat of paint, new hardware, and countertops. Elevate the look by disassembling the vanity, removing doors and drawers, and updating the cabinets for a stylish DIY makeover.
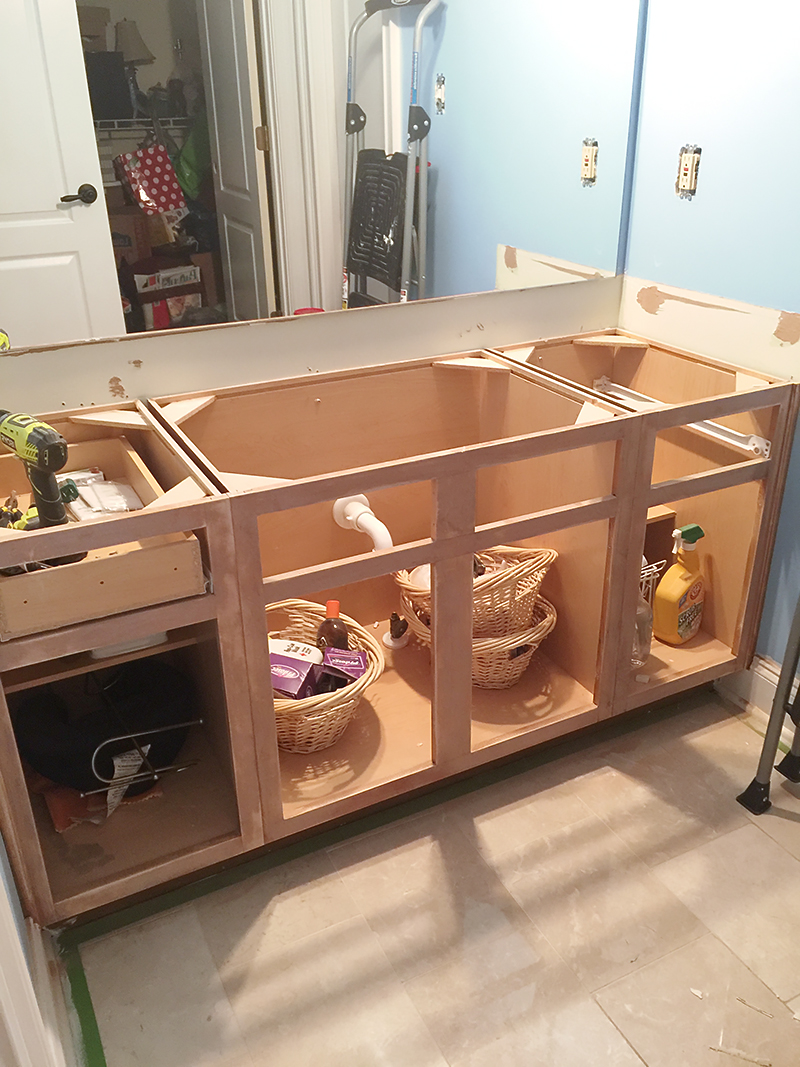
Before you can restore your bathroom vanity, you need to disassemble it. This process involves removing the doors, drawers, hardware, and countertop. By disassembling the vanity, you'll have greater access to each individual component and be able to work more efficiently and effectively.
Remove Doors and Drawers
The first step to disassemble your bathroom vanity is to remove the doors and drawers. This can usually be done by unscrewing the hinges and pulling them away from the frame. For the drawers, you'll need to find the release mechanism, which is typically located on the underside of the drawer. Once you've released the mechanism, you can simply pull the drawer out of its slot.
Detach Hardware and Countertop
Once you've removed the doors and drawers, you can move on to detaching the hardware and countertop. This involves using a screwdriver to remove any screws or bolts holding the hardware in place, such as the handles or knobs. For the countertop, you may need to use a pry bar or putty knife to gently lift it away from the vanity frame. Be sure to take your time during this step to prevent any damage to the countertop or vanity frame.
By disassembling your bathroom vanity, you'll be able to restore each individual component more effectively. With the doors, drawers, hardware, and countertop removed, you can easily clean, sand, and paint each component to give your bathroom vanity a fresh new look.
Surface Preparation
- Remove all items from the vanity.
- Wipe down the surfaces with a mild cleaner.
- Ensure surfaces are dry before proceeding.
- Use fine-grit sandpaper to sand the vanity surfaces.
- Focus on areas with existing paint or imperfections.
- Wipe off dust using a damp cloth.
Priming The Vanity
Priming the vanity is a crucial step in the process of restoring a bathroom vanity. A high-quality primer not only provides a smooth surface for the paint to adhere to but also helps to seal the wood and prevent any stains or wood tannins from bleeding through the new paint.
Choosing The Right Primer
When choosing a primer for your bathroom vanity, it's important to select a product specifically designed for the material of your vanity. For wood vanities, a high-quality wood primer is recommended, while for laminate or other non-wood surfaces, a bonding primer is ideal. Look for a primer that offers good adhesion and stain-blocking properties to ensure the best results.
Application Techniques
Proper application of the primer is essential for achieving a professional-looking finish. Before applying the primer, ensure that the vanity surface is clean and free of any dust or debris. Use a high-quality brush or roller to apply the primer evenly, following the manufacturer's instructions for drying times between coats. Multiple thin coats are preferable to a single heavy coat to avoid drips and uneven coverage.
Painting For Perfection
When it comes to giving your bathroom vanity a fresh new look, painting is a cost-effective and transformative option. With the right paint and application technique, you can achieve a flawless finish that revitalizes the entire space. Here, we'll explore the key considerations and best practices for painting your bathroom vanity to perfection.
Selecting The Paint
Choosing the right paint is crucial for a successful bathroom vanity transformation. Opt for durable and moisture-resistant paint specifically formulated for use in high-humidity environments. Look for acrylic or oil-based paints that offer excellent adhesion and durability, ensuring a long-lasting and professional finish.
Brush Vs. Spray Application
When it comes to applying the paint, you have the option of using a brush or a spray gun. Brush application allows for precise control and is well-suited for detailed work such as trim and edges. On the other hand, spray application can provide a smoother and more uniform finish, particularly on larger surfaces. Consider the size and intricacy of your vanity to determine the most suitable application method for achieving a flawless result.
Adding Distinctive Details
When updating your bathroom vanity, adding distinctive details can elevate the overall look and feel of the space.
Distressing Techniques
- Use sandpaper to distress the vanity surface for a weathered look.
- Apply a base coat, then sand the edges and corners for a vintage effect.
- Utilize a hammer or chain to create dents and imperfections.
Applying Protective Finishes
- Seal the distressed areas with a clear coat to protect the finish.
- Consider using a matte finish for a modern touch or a glossy finish for a classic appeal.
- Apply multiple coats of finish for durability and longevity.
Reassembling The Vanity
Restore your bathroom vanity with a DIY makeover, adding style and personality without replacing the entire unit. Transform the look with fresh paint, updated hardware, and countertops for a new and refreshed appearance. Refinishing options are available for various types of bathroom vanities, offering stylish ideas for a budget-friendly refresh.
After completing the painting and drying process, it's time to reassemble the bathroom vanity. The reassembling process is simple and easy to follow. In this section, we will go through the step-by-step process of reassembling the bathroom vanity.
Installing Doors and Drawers:
Firstly, start by installing the doors and drawers of the vanity. Place each door and drawer in its respective place and align the hinges and screw holes. Use a screwdriver to tighten the screws and ensure that they are properly fitted.
Attaching New Hardware:
After installing the doors and drawers, it's time to attach the new hardware. New hardware can enhance the overall look of the bathroom vanity. Place the hardware in its respective place and use screws to attach them to the vanity. Make sure that each hardware piece is properly aligned and tight.
Reassembling the bathroom vanity is a simple and easy process. By following these steps, you can easily install the doors, drawers, and new hardware to your bathroom vanity. With a little effort, you can transform your outdated bathroom vanity into a stunning and stylish piece.
Credit: www.bowerpowerblog.com
Final Touches And Decoration
After completing the essential renovation work on your bathroom vanity, it's time to add the final touches and decorations that will truly bring the space to life.
Upgrading The Countertop
If your vanity's countertop has seen better days or if you simply want to elevate the overall look, consider upgrading it. A new countertop can completely transform the aesthetic of your vanity. Opt for durable and stylish materials such as granite, marble, or quartz to add a touch of luxury to your bathroom.
Accessorizing Your Vanity
Accessorizing your vanity is the key to infusing personality and functionality into the space. Consider adding a decorative tray to corral daily essentials, such as perfumes and lotions. Introduce a stylish soap dispenser and a matching toothbrush holder to elevate the look while keeping things organized. Additionally, a statement mirror can serve as both a practical and decorative element, reflecting light and visually expanding the space.
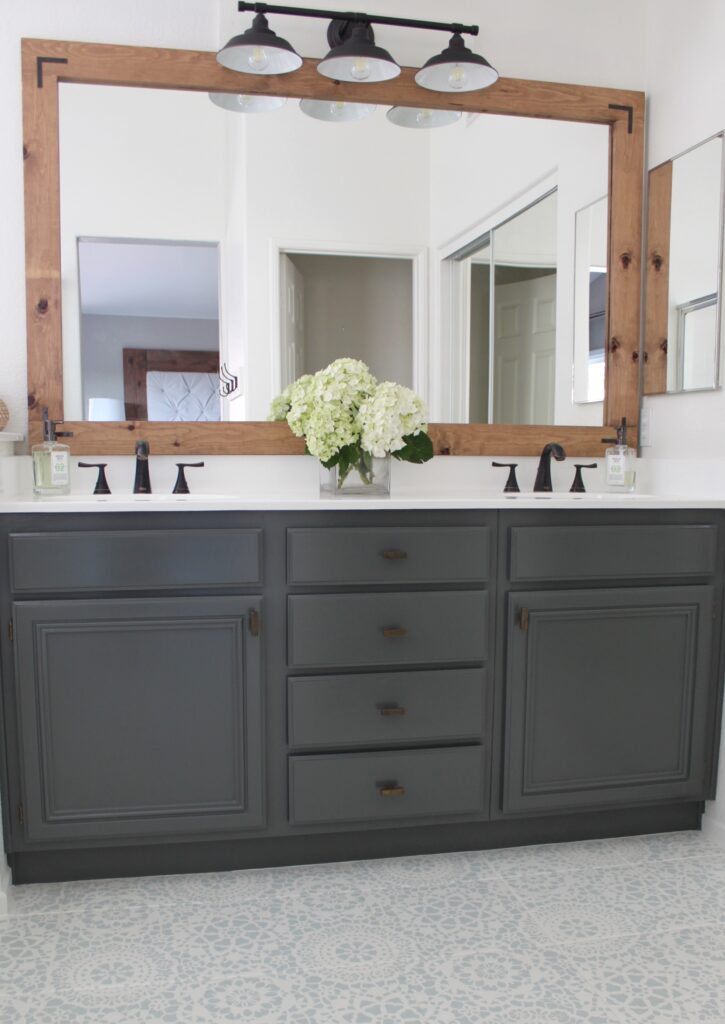
Credit: domesticblonde.com
Frequently Asked Questions
Can You Refurbish Bathroom Vanity?
Yes, you can refurbish a bathroom vanity by updating with paint, hardware, and countertops for a fresh look.
Can I Resurface My Bathroom Vanity?
Yes, you can resurface your bathroom vanity for a fresh look without replacing the entire unit.
How Do You Fix A Water Damaged Bathroom Vanity?
To fix a water damaged bathroom vanity, replace the swollen section or sand and repair it with wood filler. You can also refurbish the vanity with fresh paint, hardware, and countertops for a new look without replacing the entire unit.
Refinishing the vanity is another option for certain types of countertops.
Can You Reface A Vanity?
Refacing a vanity involves updating external surfaces by replacing doors, drawer fronts, and applying new finishes.
Can I Update My Bathroom Vanity Without Replacing It?
Yes, you can update your vanity with fresh paint, hardware, and countertops for a new look.
Conclusion
Updating your bathroom vanity can completely transform the look and feel of your bathroom. Whether it's through painting, replacing hardware, or refinishing the countertops, a refreshed vanity can breathe new life into the space. With these stylish DIY ideas, you can achieve a whole new look without the need for a complete replacement.

