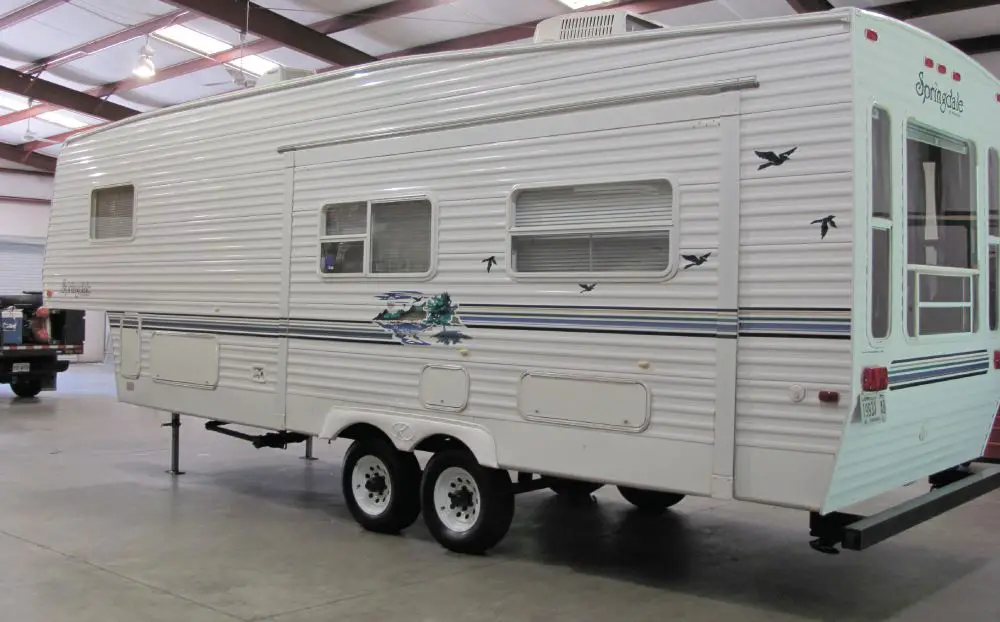
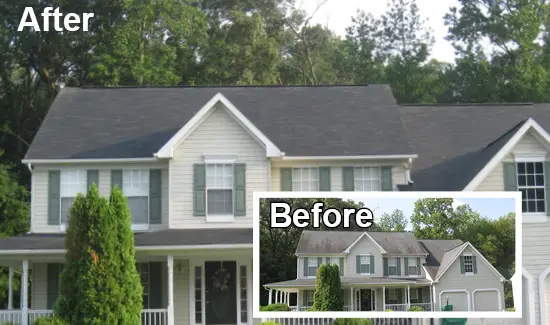
RV paint restoration involves rejuvenating the exterior paint of your recreational vehicle to its original shine and condition. This process extends the lifespan of the RV's exterior and enhances its appearance.
RV paint restoration is essential for maintaining the look and value of your vehicle. Over time, exposure to elements like UV rays, rain, and dust can cause the paint to fade, oxidize, and lose its luster. A comprehensive restoration process includes cleaning, polishing, and applying protective coatings.
These steps help remove surface imperfections, restore color vibrancy, and protect against future damage. Regular maintenance and timely restoration can prevent costly repairs and keep your RV looking new. Investing in professional RV paint restoration ensures high-quality results and long-lasting protection.

Credit: www.creativemobileinteriors.com
Introduction To Rv Paint Restoration
Recreational vehicles (RVs) are a significant investment. Keeping them in top shape ensures longevity and enhances their resale value. Over time, the paint on RVs can fade, peel, or become damaged due to exposure to elements. RV paint restoration is essential to maintain the beauty and protect the exterior surfaces. This guide will walk you through the importance and the process of RV paint restoration.
Importance Of Paint Restoration
Restoring the paint on your RV offers multiple benefits:
- Protects the Surface: Restored paint forms a protective barrier against the elements.
- Prevents Rust: Fresh paint helps prevent rust from forming on metal parts.
- Enhances Appearance: A newly painted RV looks more appealing and can boost its value.
- Increases Resale Value: Well-maintained RVs sell for higher prices.
Overview Of The Process
RV paint restoration involves several key steps:
- Cleaning: Thoroughly clean the RV to remove dirt and debris.
- Sanding: Sand the surface to remove old paint and smooth out imperfections.
- Priming: Apply a primer to prepare the surface for new paint.
- Painting: Use high-quality paint designed for RVs for the best results.
- Sealing: Apply a clear sealant to protect the new paint and enhance its longevity.
Each of these steps is crucial to achieving a smooth and durable finish. Skipping any step can result in a less-than-perfect outcome. The tools and materials used also play a critical role in the success of the restoration process.
| Step | Description |
|---|---|
| Cleaning | Remove dirt and debris from the RV's surface. |
| Sanding | Smooth out imperfections and remove old paint. |
| Priming | Prepare the surface for the new paint. |
| Painting | Apply high-quality paint designed for RVs. |
| Sealing | Protect the new paint with a clear sealant. |
By following these steps, your RV will look like new. Regular maintenance and timely restoration can keep your RV in pristine condition for years.
Assessing Paint Condition
Before starting RV paint restoration, assessing paint condition is essential. This step helps you understand the extent of damage and choose the right products.
Identifying Damage
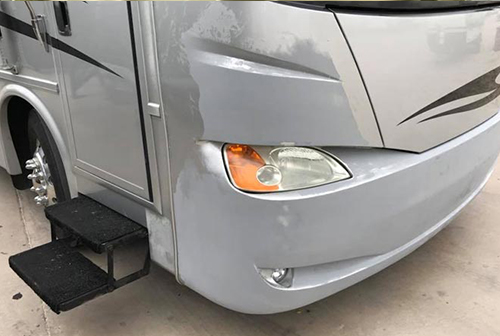
To identify damage, inspect the RV's exterior thoroughly. Look for faded areas, scratches, and peeling paint. Use a flashlight to spot cracks and chips. Take notes of damaged areas for an effective restoration plan.
| Type of Damage | Description |
|---|---|
| Fading | Loss of color and shine due to sun exposure. |
| Scratches | Surface marks caused by branches or other objects. |
| Peeling | Paint coming off in flakes. |
| Cracks | Fine lines in the paint, often due to age. |
| Chips | Small areas where paint is missing. |
Choosing The Right Products
Choosing the right products is crucial for restoring your RV's paint. Select products based on the type of damage identified. Here are some tips:
- Fading: Use a high-quality polish to restore shine.
- Scratches: Apply scratch remover or touch-up paint.
- Peeling: Sand the area and use a primer before repainting.
- Cracks: Fill cracks with a specialized filler before painting.
- Chips: Use touch-up paint for small chips.
Always read product labels and follow instructions carefully. For best results, use products recommended by RV manufacturers.
Cleaning And Preparing The Surface
To restore your RV's paint, start with cleaning and preparing the surface. This step ensures the paint adheres properly and looks its best. Below are essential tools and techniques for cleaning your RV.
Essential Cleaning Tools
Having the right tools makes cleaning easier and more effective. Here are some essential cleaning tools:
- Soft-bristle brush: Ideal for scrubbing without scratching.
- Microfiber cloths: Perfect for drying and polishing.
- Bucket: Holds water and cleaning solution.
- Pressure washer: Removes tough dirt and grime.
- Cleaning solution: Specifically made for vehicle surfaces.
Effective Cleaning Techniques
Use these techniques to clean your RV efficiently:
- Rinse with water: Start by rinsing the RV with water. This removes loose dirt and debris.
- Apply cleaning solution: Mix the solution in a bucket. Apply it with a soft-bristle brush.
- Scrub gently: Scrub the surface in circular motions. Be gentle to avoid scratches.
- Rinse thoroughly: Use a pressure washer or hose to rinse off the soap.
- Dry the surface: Use microfiber cloths to dry the RV. Ensure no water spots remain.
These steps prepare the surface for paint restoration. Clean surfaces ensure better paint adhesion and a smoother finish.
Paint Correction Techniques
Restoring the paint on your RV ensures it looks fresh and new. Paint correction techniques help remove imperfections and enhance the vehicle's appearance. These methods make your RV shine and stand out.
Polishing The Surface
Polishing is a crucial step in paint correction. It removes minor imperfections and enhances the shine. Use a dual-action polisher for the best results.
- Start with a clean surface.
- Apply a small amount of polish to the pad.
- Work in small sections.
- Use slow, overlapping motions.
- Wipe off excess polish with a microfiber cloth.
Removing Scratches And Swirls
Scratches and swirls can make your RV look old and worn. Removing them improves the vehicle's appearance. Use a compound designed for removing scratches.
- Clean the area thoroughly.
- Apply the compound to a polishing pad.
- Work the compound into the surface.
- Use a microfiber cloth to wipe away residue.
- Inspect the area to ensure the scratches are gone.
Repeat these steps if necessary for deeper scratches. Always follow up with a polish to enhance the shine.
Applying Protective Coatings
Applying protective coatings to your RV is essential. It helps in maintaining its shiny appearance and protects the paint from damage. Let's dive into the different types of coatings and the methods to apply them.
Types Of Coatings
There are several types of coatings available for RV paint restoration. Below, we outline some of the most popular options:
| Type of Coating | Description |
|---|---|
| Wax Coatings | Provides a glossy finish and protects from UV rays. |
| Ceramic Coatings | Offers long-lasting protection and is resistant to scratches. |
| Polymer Sealants | Creates a durable barrier against dirt and grime. |
| Acrylic Coatings | Easy to apply and gives a high-gloss finish. |
Application Methods
There are different ways to apply these coatings. Here are some common methods:
- Hand Application: Use a foam applicator pad. Apply the coating in circular motions.
- Machine Application: Use a dual-action polisher. This method provides even coverage.
- Spray Application: Use a spray gun for an even layer. This method is quick and efficient.
Follow the manufacturer's instructions for the best results. Always ensure the RV surface is clean before applying any coating. This will ensure better adhesion and a longer-lasting finish.
Credit: www.myrvoutpost.com
Maintaining The New Shine
Keeping your RV looking new is crucial. A shiny RV turns heads and keeps its value. To keep that shine, follow these simple steps.
Routine Maintenance Tips
Routine maintenance is key. Here are some easy tips to follow:
- Wash your RV regularly: Use a mild soap and water. Avoid harsh chemicals.
- Dry thoroughly: Use a soft cloth or chamois to dry the surface.
- Inspect for damage: Look for scratches or dents. Address them promptly.
- Use a quality wax: Apply wax every six months to protect the paint.
- Park in the shade: This prevents sun damage and keeps the paint vibrant.
Best Practices For Long-term Care
Long-term care keeps your RV's paint in top shape. Follow these best practices:
- Cover your RV: Use a breathable cover when not in use. This protects it from dust and debris.
- Avoid parking near trees: Sap and bird droppings can damage the paint.
- Touch up scratches: Use touch-up paint to fix minor scratches. This prevents rust.
- Use protective coatings: Consider ceramic coatings for extra protection.
- Regularly inspect the roof: Ensure there are no leaks. Water can damage the paint.
By following these tips, your RV will stay shiny and new for years to come.
Common Mistakes To Avoid
Restoring the paint on your RV can be rewarding. But, many people make common mistakes that lead to poor results. Avoiding these mistakes can save time and money. Here are the most frequent errors you should avoid.
Overlooking Surface Preparation
Proper surface preparation is crucial. Many people skip this step. Neglecting this can lead to paint peeling or chipping.
Before painting, clean the surface thoroughly. Remove all dirt, grease, and old paint. Use a degreaser if needed. Sand the surface to create a smooth, even base.
- Clean the surface with soap and water.
- Use a degreaser to remove stubborn grime.
- Sand the surface to smooth out rough patches.
Skipping these steps will result in poor paint adhesion. The new paint will not last long if the surface is not well-prepared.
Using Incorrect Products
Another common mistake is using the wrong products. Not all paints and primers are suitable for RVs.
Check the product labels. Ensure they are designed for RV surfaces. Using incorrect products can cause long-term damage.
| Product | Suitable For RVs? |
|---|---|
| Automotive Paint | Yes |
| Household Paint | No |
| Epoxy Primer | Yes |
| Latex Primer | No |
Always use products recommended by experts. This ensures the longevity of your RV’s new look.
Follow these tips to avoid the most common mistakes. Your RV paint restoration will be successful and long-lasting.
Tools And Products Recommended
Restoring the paint on your RV can breathe new life into it. The right tools and products can make a significant difference. Below, we highlight the best restoration kits and essential equipment for RV paint restoration.
Top-rated Restoration Kits
Choosing a top-rated restoration kit can save you time and effort. Here are some of the best kits available:
| Product | Features | Price Range |
|---|---|---|
| Meguiar's RV/Marine Restoration Kit | Complete with polish, wax, and cleaner | $60 - $80 |
| 3M Marine Restorer & Wax | Removes oxidation and restores shine | $30 - $50 |
| Gel-Gloss RV Wash and Wax | One-step cleaner and wax | $20 - $40 |
Essential Equipment
Having the right equipment is crucial for a successful restoration. Here is a list of essential items:
- Electric Polisher: Ensure an even application of polish and wax.
- Microfiber Towels: Soft and safe for RV surfaces.
- Detailing Brushes: Reach tight spots and corners.
- Masking Tape: Protects areas from unwanted paint.
- Sandpaper: Prepares the surface by removing old paint and rust.
- Step 1: Clean the RV thoroughly.
- Step 2: Mask areas not to be painted.
- Step 3: Sand the surface for a smooth finish.
- Step 4: Apply the polish with an electric polisher.
- Step 5: Use microfiber towels for the final touch.
Diy Vs Professional Services
Restoring your RV's paint can make it look brand new. There are two main ways to do this: DIY or hire a professional. Each choice has its own benefits and drawbacks. Let's explore these options to help you decide the best fit for your needs.
Benefits Of Diy Restoration
DIY paint restoration offers several benefits. First, it can save you money. Professional services can be expensive. By doing it yourself, you can cut costs.
Another benefit is the learning experience. Working on your RV can be rewarding. You will learn new skills and gain confidence. Plus, you can work at your own pace.
Lastly, you have complete control over the process. You can choose the products and methods you prefer. This ensures your RV gets the care it deserves.
When To Seek Professional Help
Sometimes, professional services are the better choice. If you lack the time or tools, professionals can help. They have the right equipment and expertise.
Professional services are also good for major damage. If your RV has deep scratches or faded paint, experts can fix it. They have access to high-quality materials and techniques.
Lastly, professionals often offer warranties. If something goes wrong, they will fix it. This gives you peace of mind.

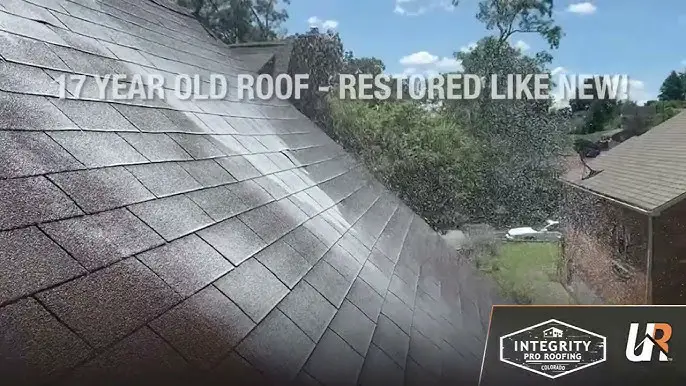
Credit: m.youtube.com
Frequently Asked Questions
How To Make An Old Rv Look New?
Clean and repaint the exterior. Update the interior with new upholstery and curtains. Replace old fixtures. Install modern lighting. Add decorative touches.
How Do You Remove Oxidation From Rv Paint?
To remove oxidation from RV paint, wash the RV thoroughly. Apply a rubbing compound using a soft cloth. Buff in circular motions. Rinse and dry the area. Finish with a quality wax for protection.
What Kind Of Paint Should I Use To Paint My Rv?
Use high-quality, automotive-grade paint for your RV. It ensures durability and a smooth finish. Select either acrylic or urethane-based paint for the best results. Always prime the surface before painting.
How To Repaint Rv Exterior?
Clean the RV thoroughly. Sand the surface to remove old paint. Apply primer evenly. Use quality paint and spray in thin, even coats. Let each coat dry before adding the next. Finish with a clear sealant for protection.
Conclusion
Reviving your RV's paint can bring back its original charm and increase its value. Follow these restoration tips for a sparkling finish. Regular maintenance will keep your RV looking great for years. Invest time and effort in paint care to enjoy a stunning, well-preserved vehicle on your journeys.

